 调式环境准备
在正式开始源代码的解读之前,我们先来准备一下调试环境。环境的准备也较为简单,就是搭建一个简单的Vue项目,然后将Vuex源码作为我们项目的源代码来调试。
提示
你也可以跳过这一步,直接使用我准备好的调试环境,项目包含了源代码的注释以及调试环境:https://github.com/prianyu/vuex3.0.1 (opens new window)
# 1. 项目初始化
创建一个新目录vuex-source,进入目录并运行以下命令行初始化项目:
npm init -y
# 2. 安装依赖
npm install webpack webpack-cli webpack-dev-devserver  html-webpack-plugin vue-loader@15 -D
npm install vue@2.7.4 vue-template-compiler@2.7.4
2
# 3. 项目配置
新建webpack.config.js文件,内容如下:
const path = require('path')
const HtmlWebpackPlugin = require("html-webpack-plugin")
const { VueLoaderPlugin } = require("vue-loader")

module.exports = {
  mode: "development",
  entry: "./src/main.js",
  output: {
    path: path.resolve(__dirname, "dist"),
    filename: "bundle.js",
  },
  module: {
    rules: [
      {
        test: /\.vue$/,
        loader: 'vue-loader',
        exclude: /node_modules/
      }
    ]
  },

  plugins: [
    new HtmlWebpackPlugin({
      template: './src/index.html'
    }),
    new VueLoaderPlugin()
  ],

  devServer: {
    hot: true
  },

  devtool: "inline-source-map"
}
2
3
4
5
6
7
8
9
10
11
12
13
14
15
16
17
18
19
20
21
22
23
24
25
26
27
28
29
30
31
32
33
34
35
我们的目的是为了调试vuex的源码,所以只需要最少的配置就可以了,同时需要开启source-map
# 4. 应用编写
创建src目录,并新建main.js、index.html、index.vue文件,内容如下:
<!-- index.html -->
 <!DOCTYPE html>
<html lang="en">
<head>
  <meta charset="UTF-8">
  <meta name="viewport" content="width=device-width, initial-scale=1.0">
  <title>Document</title>
</head>
<body>
  <div id="app"></div>
</body>
</html>
2
3
4
5
6
7
8
9
10
11
12
<!-- App.vue -->
<template>
  <div>
    {{  msg  }}
  </div>
</template>
<script>
export default {
  data() {
    return {
      msg: "hello world"
    }
  }
}

</script>
2
3
4
5
6
7
8
9
10
11
12
13
14
15
16
// main.js
import Vue from "vue"
import App from "./App.vue"

new Vue({
  render: h => h(App)
}).$mount("#app")
2
3
4
5
6
7
# 5. 运行项目
在package.json文件中添加以下脚本:
"scripts": {
  "dev": "webpack serve --open --config ./webpack.config.js"
}
2
3
4
运行命令:
npm run dev
项目启动,并正常在页面显示hello world
# 6. 添加Vuex源码
Npm上的库一般都是经过编译打包后的代码,Vuex也不例外。我们读取源码一般是拉取官方仓库的源代码来阅读,在Vuex的github仓库 (opens new window)上找到v3.0.1版本的tag,然后下载或者clone至本地。然后在vuex-soure/src添加一个vuex目录,将下载下来的vuex源码中src目录下的内容拷贝至vuex-soure/src/vuex目录下。此时目录结构如下:
├─vuex-source
├── package-lock.json
├── package.json
├── src
│   ├── App.vue
│   ├── index.html
│   ├── main.js
│   ├── store.js
│   └── vuex
│       ├── helpers.js
│       ├── index.esm.js
│       ├── index.js
│       ├── mixin.js
│       ├── module
│       ├── plugins
│       ├── store.js
│       └── util.js
└── webpack.config.js
2
3
4
5
6
7
8
9
10
11
12
13
14
15
16
17
18
19
# 7. 使用Vuex
在src目录下新建文件store.js,内容如下:
import Vue from 'vue'
import Vuex from './vuex' // 引入本地的vuex

Vue.use(Vuex) // 安装vuex

const store = new Vuex.Store({
  state: {
    count: 0
  },
  mutations: {
    increment(state) {
      state.count++
    }
  }
})

export default store
2
3
4
5
6
7
8
9
10
11
12
13
14
15
16
17
18
修改src/main.js文件:
// ...
import store from './store'

new Vue({
  store, // 使用store
  render: h => h(App)
}).$mount("#app")
2
3
4
5
6
7
修改App.vue,在模板中增加$store.state.count的显示:
<template>
  <div>
    {{  msg  }} {{  $store.state.count }}
  </div>
</template>
2
3
4
5
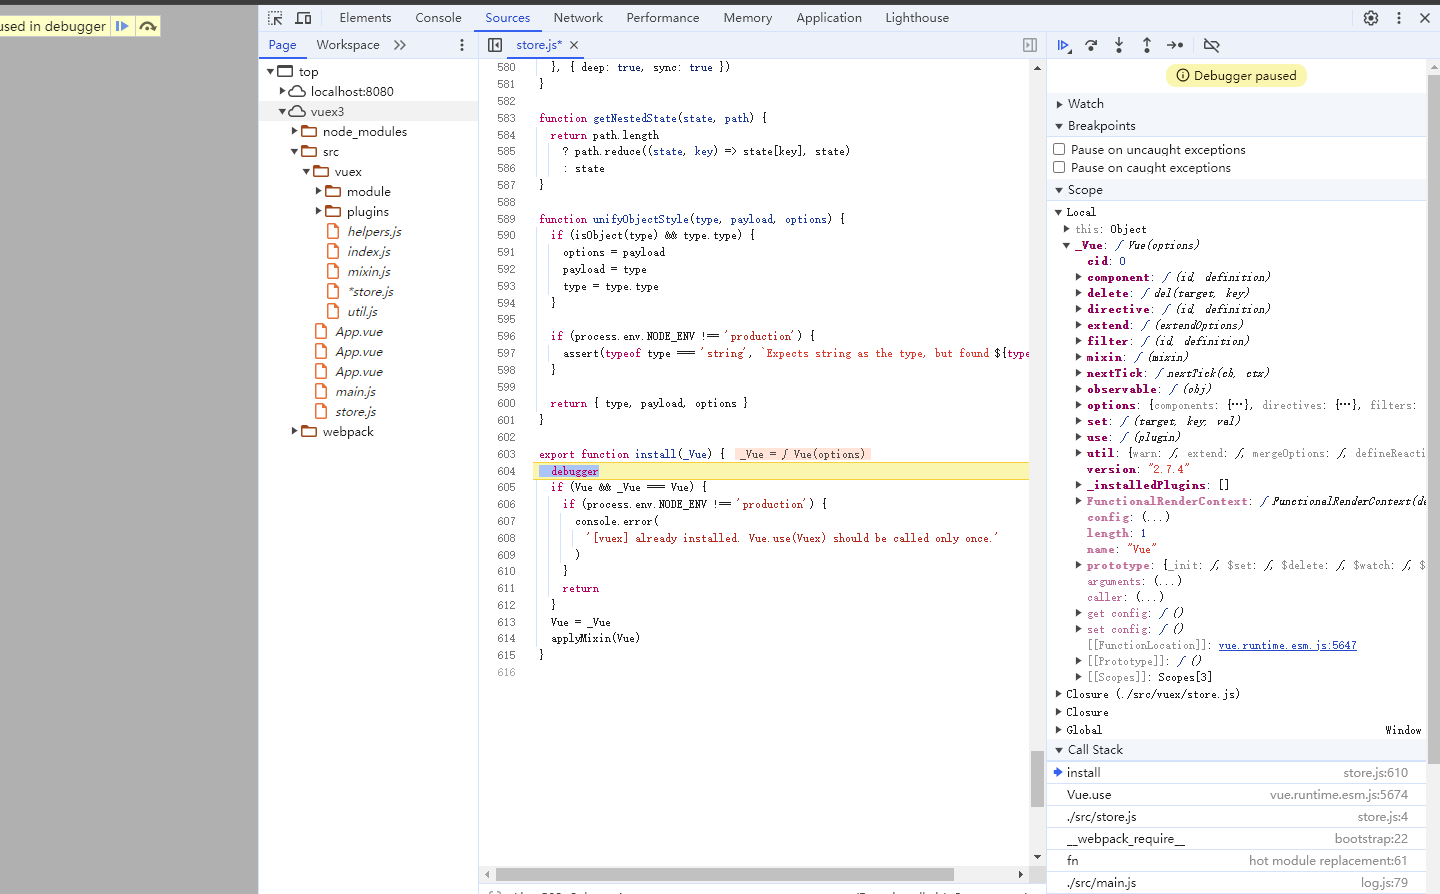
打开src/vuex/store.js文件,找到install函数,增加debugger标记:
export function install(_Vue) {
  debugger
  // ...
}
2
3
4
5
打开控制台,运行项目,效果如下:

至此,我们完成了调试环境的准备,接下来我们正式开始源代码的调式和解读。